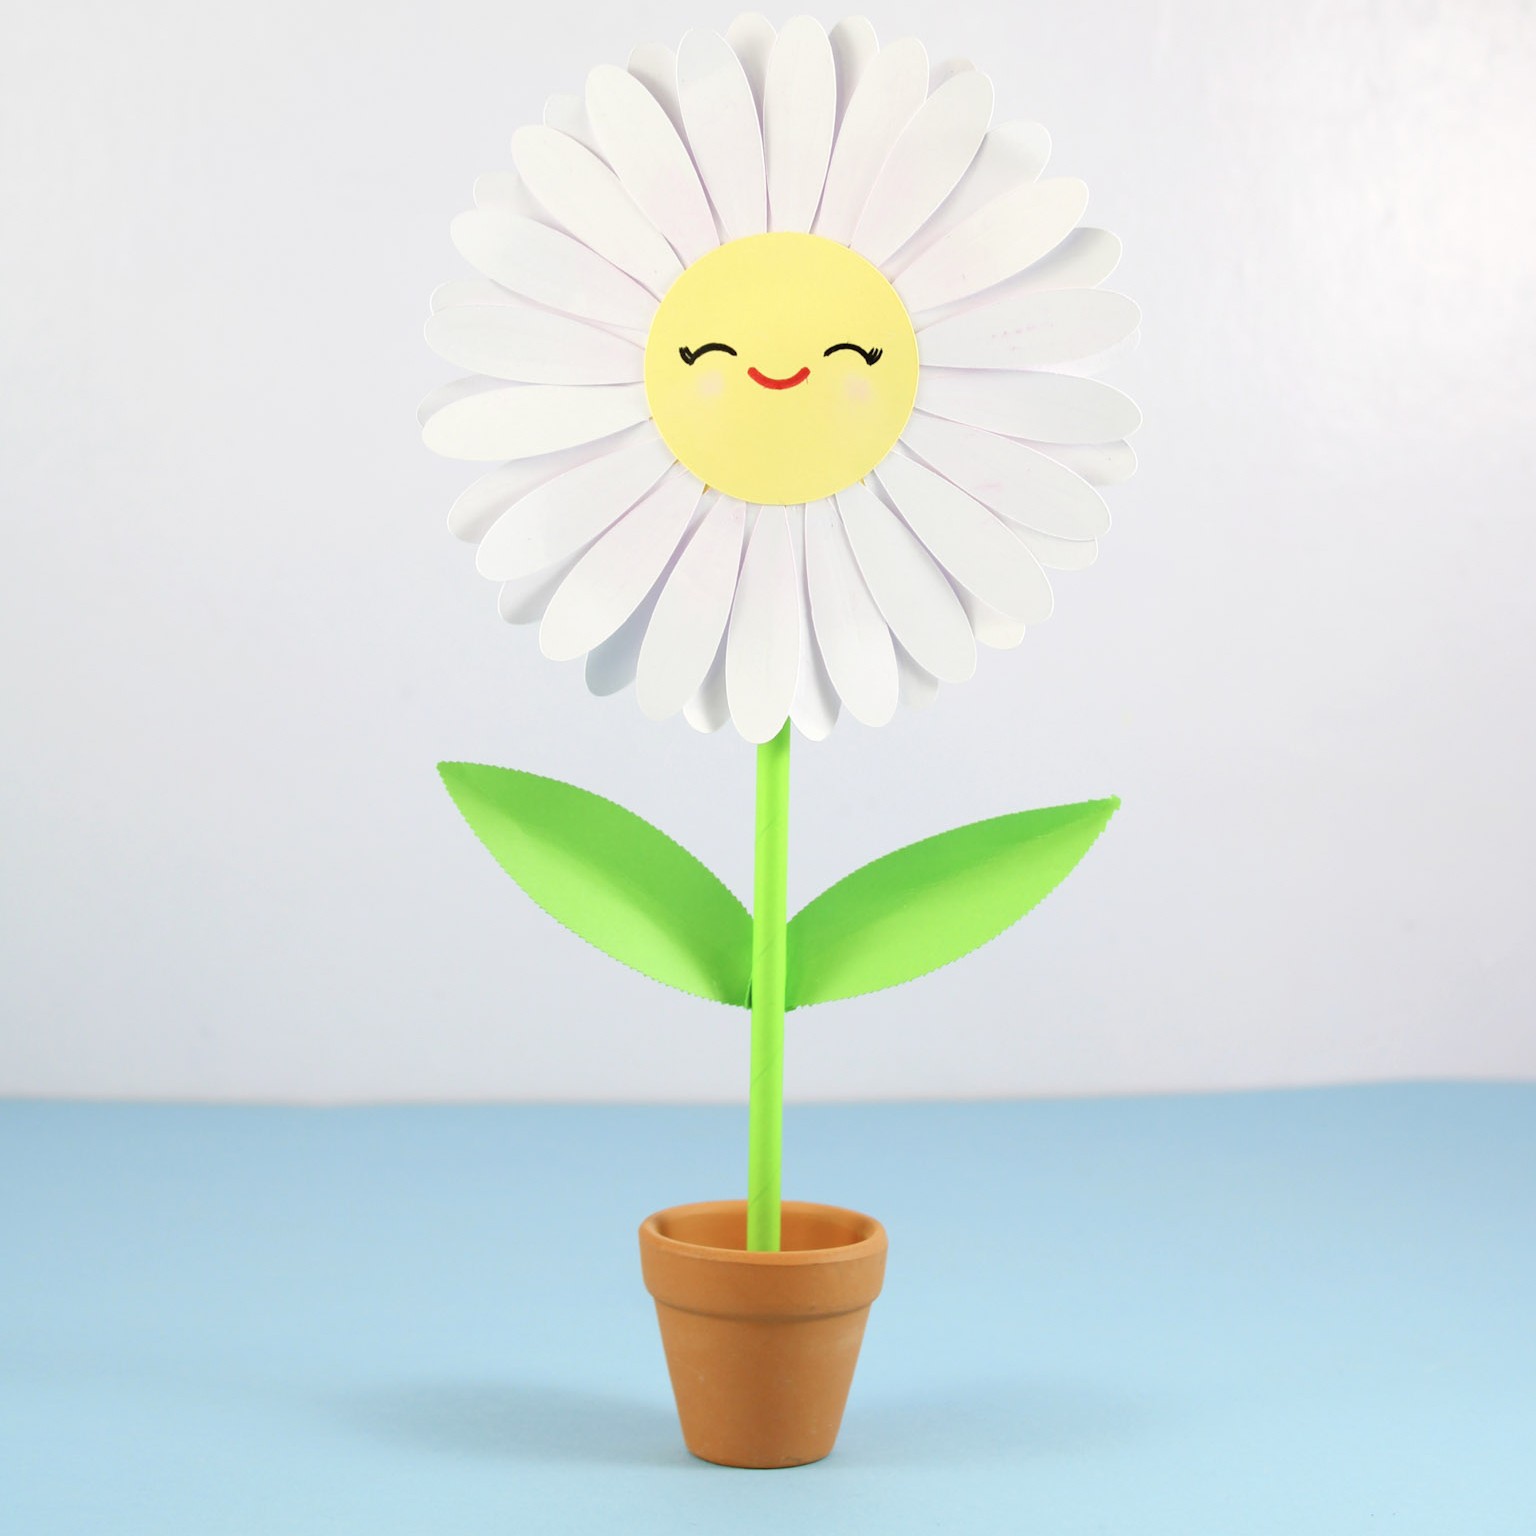
This sweet daisy is a simple spring papercraft, using fine motor skills to carefully trace and cut the daisy petals. Create the daisy face using marker and pink pastel dust for some rosy cheeks, and use a leafy straw stem and real miniature plant pot to bring your flower to life. The end result is a piece of beautiful spring décor. Combine with this summery sunflower craft, make a few more with some different coloured petals, and you’ll have a pretend shop full of fake flowers to role play with!
* This post may contain affiliate links. If you click on these links to purchase a product, I may earn a small commission, without any additional cost to you!
You Will Need
- Green straw
- Small ball of clay
- Plant pot
- Green cardstock
- Pink pastel
- Sponge/ eyeshadow brush or cotton bud
- White cardstock
- Yellow cardstock
- Scissors
- Tacky glue
- Black and pink markers
- Ball point tool or dowel
- Brown Tissue Paper
Enter your email below for access to your free PDF printables and SVG files.
(By entering your email address you will become subscribed to the Craft Learn Play Repeat weekly newsletter, which keeps you up to date with all of our latest projects. You can unsubscribe from these emails at any time)
If using the PDF Printable – Print onto white cardstock. Cut around the petal shapes. Use the circle template to cut out a yellow circle for the flower face and use the template itself as the flower head base. Use the leaf template to cut out 2 leaves from the green card.
If using a cutting machine- Change the green line on the yellow circle to the pen tool and attach the pen line to the circle. Cut the circles from yellow cardstock, the petals from white cardstock and the leaves from green cardstock.
Add scorelines lengthways along each petal by pressing down with a round ended object, such as the end of a paintbrush or a ball point tool

Apply pink pastel dust to the tapered sections of the petals. I used pan pastels but you can rub a pink pastel onto a sheet of paper to create some dust, then dip a cottonbud, wedge ended sponge or eyeshadow brush and apply to the petals.

Apply glue to the outer edge of the flower head base with the pen line in the centre.

Use the line as a guide to place your first layer of petals.

Apply dots of glue between the petals that you have placed in your first layer.

Apply the second layer of petals.

Draw a face onto your second yellow circle, using your markers.

Use the pink pastel dust and a cotton bud or make up brush to make rosy cheeks on the daisy’s face.

Glue the daisy face onto the flower base.

Lay your daisy head face down and place the top of your green straw onto the centre back, attaching with a piece of tape.

Make a fold in each of your green leaves using the edge of a ruler or scraper tool.

Glue to the leaves to the back of the straw stem.

Place a ball of air dry, polymer clay or poster putty on to the end of the straw to add weight and place it in the bottom of your plant pot.

Fill the base with scrunched up brown tissue paper. Your beautiful daisy craft is now finished!
